 |
|
|
| Home |
HHGs and
Orgone Matrix Material
The type of
orgone device which is commonly called a 'Holy hand grenade' is a
medium-sized device which attracts harmful Orgone energy, converts it
to healthy Orgone energy, and emits it again as a flow of healthy
orgone energy. This is different from other orgone devices used up
until this point, which had the ability to block or collect harmful
energy, but not convert it to healthy energy.
|
|
| Products |
| Site
Map |
| Gallery |
| Info |
| Links |
|
|
|
The device
gets it's name from an old Monty Python movie ;)... It was invented (
by Don Croft ) to counteract the adverse physical and mental health
effects of HAARP, GWEN, ELF, SCALAR and HPRF transmission towers. The
HHG device is a highly effective multipurpose energy cleaner. Think of
it as air freshener for your aura. When placed in an area, buried, or
placed in a body of water, the Orgonite Holy hand grenade will act to
continuously clean the Orgone energy within a surprisingly large radius
(average 3/4 mile radius from the device). Although many of us who
build these devices are familiar with using various minerals in
metaphysics, and therefore use synergistic combinations of minerals to
enhance these devices, the basic components of an HHG are
quartz crystals, metal particles and organic resin. After about six
months, they benefit from being moved around a bit if accessible.
Materials you will
need:
|
Item:
|
Quantity per HHG:
|
|
- Double (pref.)
or single terminate Quartz Crystal
|
- 5 (or 1 DT and 4
STs)
|
|
- Polyester Resin
& enough Catalyst to cure it
|
- About 6 Ounces
|
|
- Metal particles
|
- About 5 Ounces
of metal particles
|
|
- Suitable
container to use for a mold
|
- 1 (min. 4" dia.
plastic funnel)
|
|
- Small Jar or Can
to sit the funnel in (hold it upright)
|
- 1
|
Note: While there
are many other suitable vessels which could serve as mold for this
device, I have used a plastic funnel for this example as it is readily
available in most places and relatively durable. In any case, the same
technique of construction applies regardless of the container used for
a mold, which can be in the shape of a pyramid, cone, cylinder or
hemisphere, so long as it has a volume at least great that of a as a
cone 4" wide x 4" tall. Presently, pyramids and cones are the shape
this device is most often built in.
|
| 1.
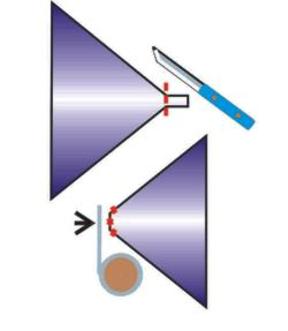
- Cut the tip off of the funnel and tape over the hole at the small end
of the funnel with aluminum tape (preferable) or parcel tape.
Electrical tape, duct tape & masking tape do not work as well
for this as aluminum tape. In some way, plug the hole so that the resin
does not leak out. |
|
| 2.
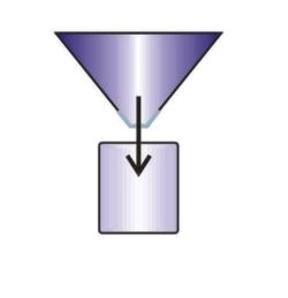
- Sit the funnel in the jar so that it is upright and more or less
level. |
|
| 3.
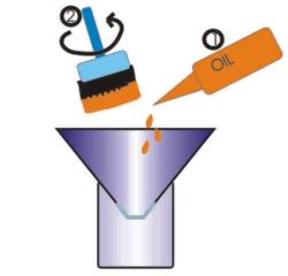
- Coat the inside of the funnel with a thin layer of vegetable oil, to
keep the resin from sticking to the mold (funnel). Wipe away the excess
oil with a brush or clean cloth. |
|
| 4.
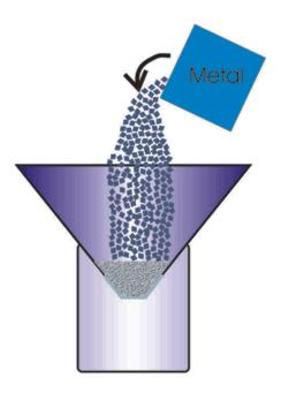
- Put about 1" of metal particles in the bottom of the mold. |
|
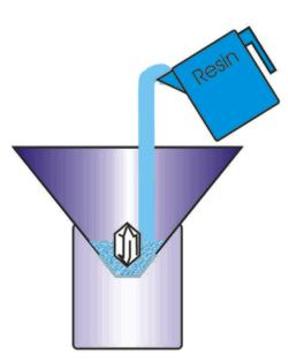
| 5.
- Place one of the Quartz crystals in the tip of the mold, so that it
is upright as shown. This one really should be a double terminate, but
if you only have a single terminate, put it with the point towards the
tip of the funnel. If it is a double terminate, the best tip of the
crystal should be pointing towards the tip of the funnel, where you
covered the hole with tape.
Mix enough resin and catalyst (be sure to mix well, min. 1 minute of
mixing) to come up level with the surface of the metal filings. Pour
the resin in and let it run down into the metal filings. Gently shake
or tap the mold to release bubbles.
|
|
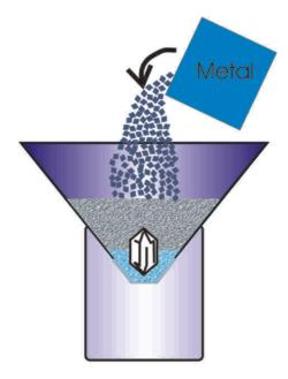
| 6.
- Put in some more metal particles, enough to fill the mold about 1/2
to 2/3 full. |
|
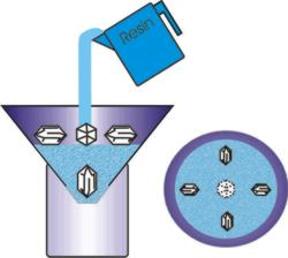
| 7.
- Place the other 4 Quartz crystals on top of the metal filings as
shown. They should be arranged like the spokes of a wheel. The better
points of the crystals should be pointing towards the outside of the
mold. If you have to, you can use single terminate crystals here, and
put them with the points either facing in or out (facing out is
preferable). Mix some more resin and catalyst, and pour in enough to
come up level with the surface of the metal filings again. Gently tap
or shake the mold to release bubbles, and let the resin run down into
the metal filings. |
|
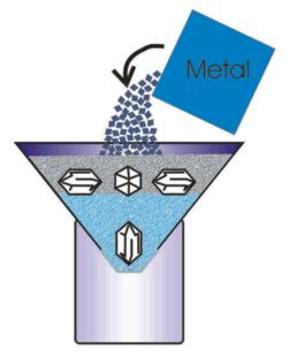
| 8.
- Add some more metal filings, enough to almost (but not quite) fill
the mold. Leave about 1/4 inch of empty space at the top of the mold as
shown. |
|
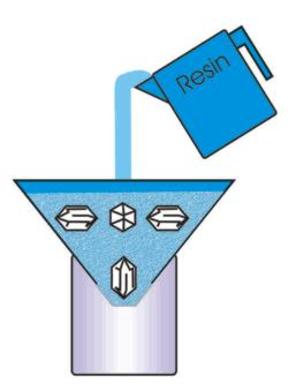
| 9.
- Now, pour in enough resin to finish filling the mold. Let the resin
run down into the metal filings, adding a little at a time. Use enough
resin to completely cover the metal filings, so that there is a thin
layer at the top of the mold which is only resin, no metal. The layer
of resin only should be about 1/4" thick. Take a moment to adjust the
molds so that they are more or less level at this point. |
|
|
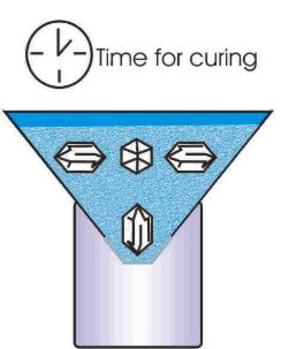
10.
- Allow the resin to cure. Keep it warm if possible, cure in a
well-ventilated area, and if possible, expose the resin to sunlight
while it is curing. If you have a tone generator or other sonotherapy
(healing using sound) device, then you can expose the resin to that as
well while it cures.
|
|
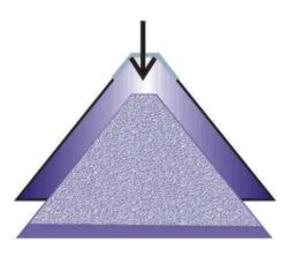
| 11.
- Remove the molds from the jars, turn them upside down, and give them
a smack to release the brand new HHG you just made. If the mold sticks,
you can either use a thin bladed knife to push in between the mold and
the resin, or you can try spraying penetrating oil around the edges
where the mold meets the resin. Dropping it on the floor sometimes
works, but sometimes it breaks the resin.
|
|
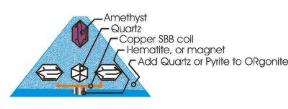
| 12.
- There are many ways to modify an HHG for enhanced effects, but the
basic model shown above will work just fine the way it is. This is one
modification which is easy to perform when you are casting the Hhgs.
Use an Amethyst point instead of a DT Quartz crystal for the vertical
crystal... add a copper SBB coil to the base of the unit, just at the
edge of the metal filings as shown... add a small piece of hematite,
pyrite, or a small permanent magnet to the SBB coil as shown (generally
I put the N pole of the magnet facing toward the tip of the HHG)... and
mix some crushed quartz, crushed Amethyst, or crushed Pyrite in with
the metal particles before you cast it. |
|
 
This
is all the info you need to get started making fully functional basic
HHGs. Please feel free to make copies of, re-post on your own
site, save on your hard drive, print and/or distribute this page
freely, so long as the page is reproduced in it's entirety and
unaltered, including all links embedded therein. There is a runic
version of the orgonite above which provides for the idea and
action of it here.
|
|
|
Orgonite
TM is a trademark belonging to Karl Welz, the
inventor of orgonite, and is used on littlemountainsmudge.com for
educational purposes. Wizzer's
Workshop
TM, Ergonite TM,
Welzite
TM, Wood Sprite TM,
Water Baby
TM, Chocolate Shine TM
and O-Matrix Material TM are trademarks of Jon Logan, Owner of
littlemountainsmudge.com. All text and images on this site on this
site, unless clearly otherwise stated, are copyright 2003-2006 Jon
Logan, all rights reserved. Limited authorization to reproduce: This
material may be reproduced or reprinted freely, in whole or in part,
for educational purposes. Owner of copyright for text
and images on littlemountainsmudge.com and trademarks used on
littlemountainsmudge.com reserves the right to refuse,
suspend or revoke limited authorization to reproduce this material if
the material is reproduced inaccurately, or if printed material from
this website is sold at a cost in excess of it's production without
prior written consent from the owner, or if printed material from this
site is used commercially without stating in the printed copy that the
material is copyright 2003-2006 Jon Logan. Webmasters using material
from this site must include " courtesy Wizzers Workshop
http://www.littlemountainsmudge.com" at the end of the portion of
content which is reproduced on your website.
|


